Art Studio Organization: Tackling Paper Clutter as a Mixed Media Artist
Hi friends! Welcome to my art studio organization series! Today, I want to tackle a challenge that I face as a mixed media artist: paper clutter. Can you relate?
Did you miss the first post in this series? Read here
As someone who loves to create her own papers through a variety of techniques, I find myself with a surplus of paper that I need to organize. I have hand-painted papers, patterned papers, gelli prints, drippy inky papers, plain papers like cardstock and printer paper, as well as found papers from old books and magazines. It's a lot to keep track of! And let's not forget the scraps of paper that accumulate with each project, threatening to take over my workspace. In this post, I'll share my personal approach to organizing and storing all of my paper, including tips for handling those pesky scraps.
Did you catch my video tour of my art studio? Watch now >>

In my own journey towards organizing my paper clutter, I’ve tried different approaches until I found a system that works well for me. Although it’s not perfect, it's accessible, organized, and I know exactly where everything is. One of the first big decisions I had to make was deciding on my categories. When thinking about how I search for my papers during my art-making process, I had to choose between sorting based on paper type or color. Initially, I decided to sort and store my papers based on their types. This meant that I had categories for text, weight, plain, lined, patterned, hand-painted, scrapbooking pages, and recycled papers.
However, I found that when I was working on a particular project, I often pulled out papers based on colors rather than types. As someone who frequently works with a limited color palette, it made more sense for me to sort my papers by color. Now, my system is a combination of both types and colors. I sort my papers mainly by color and then a bit by type as well. But, what works best for me may not work for everyone, so it's essential to experiment and find a system that works for you. Remember that over time, your organization system may evolve, and that's okay!
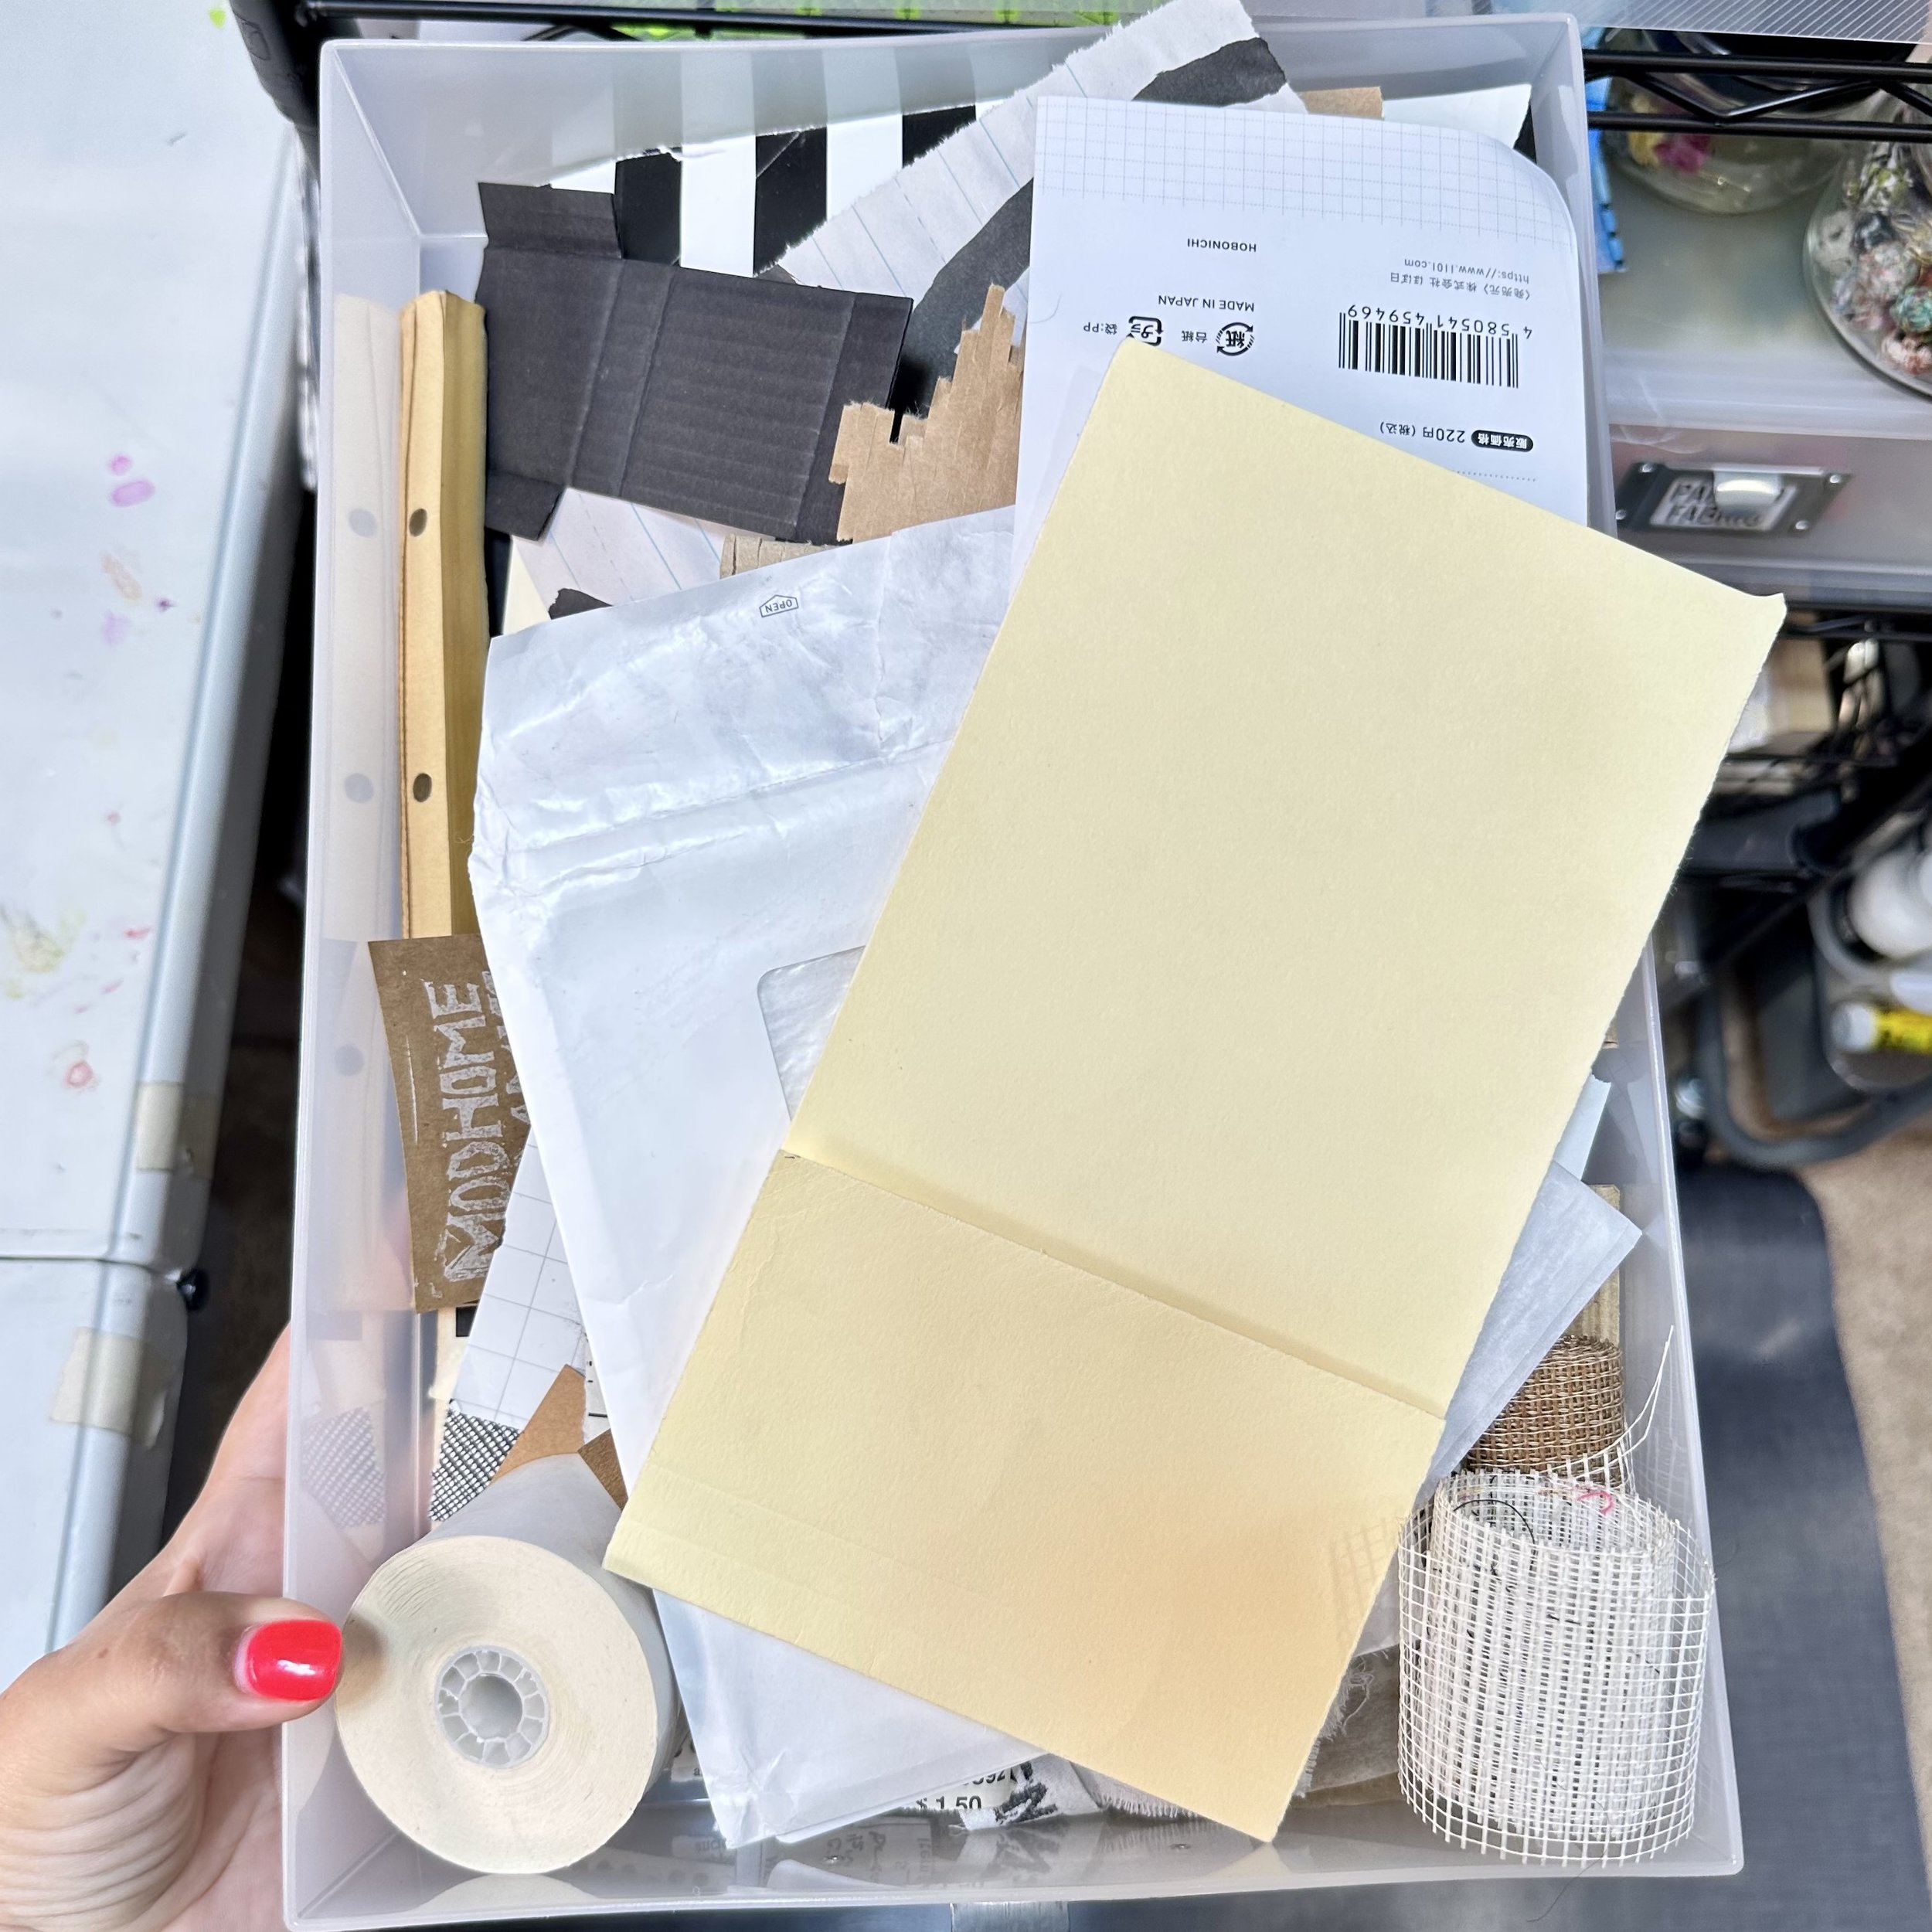
Let's start by exploring what I call my "excess found papers." Found papers refer to a variety of paper materials including vintage books, text, magazines, maps, recipe books, and even store-bought paper such as cardstocks, printer papers, and graph paper. To ensure easier access, I keep a small portion of each type in my hanging file folder system (I’ll talk about this next), allowing me to quickly and easily grab what I need without having to walk across the room. I use open-top dividers to sort the papers by type, though I don't label them as I can easily see what's inside. Instead of precise category names, I sort them by genre. For example, I have small sheet book text, recipe pages, dictionary, phone book, maps, pages with math or charts, ledger paper, manuals, and more. I often strip old and vintage books from the spine after purchase as it makes it more likely that I will use them in my art. By doing so, I don't have to go through the effort of separating the pages from the spine when it comes time to create art. However, if I plan to use the book in its entirety, such as for an altered book journal, I leave it intact.
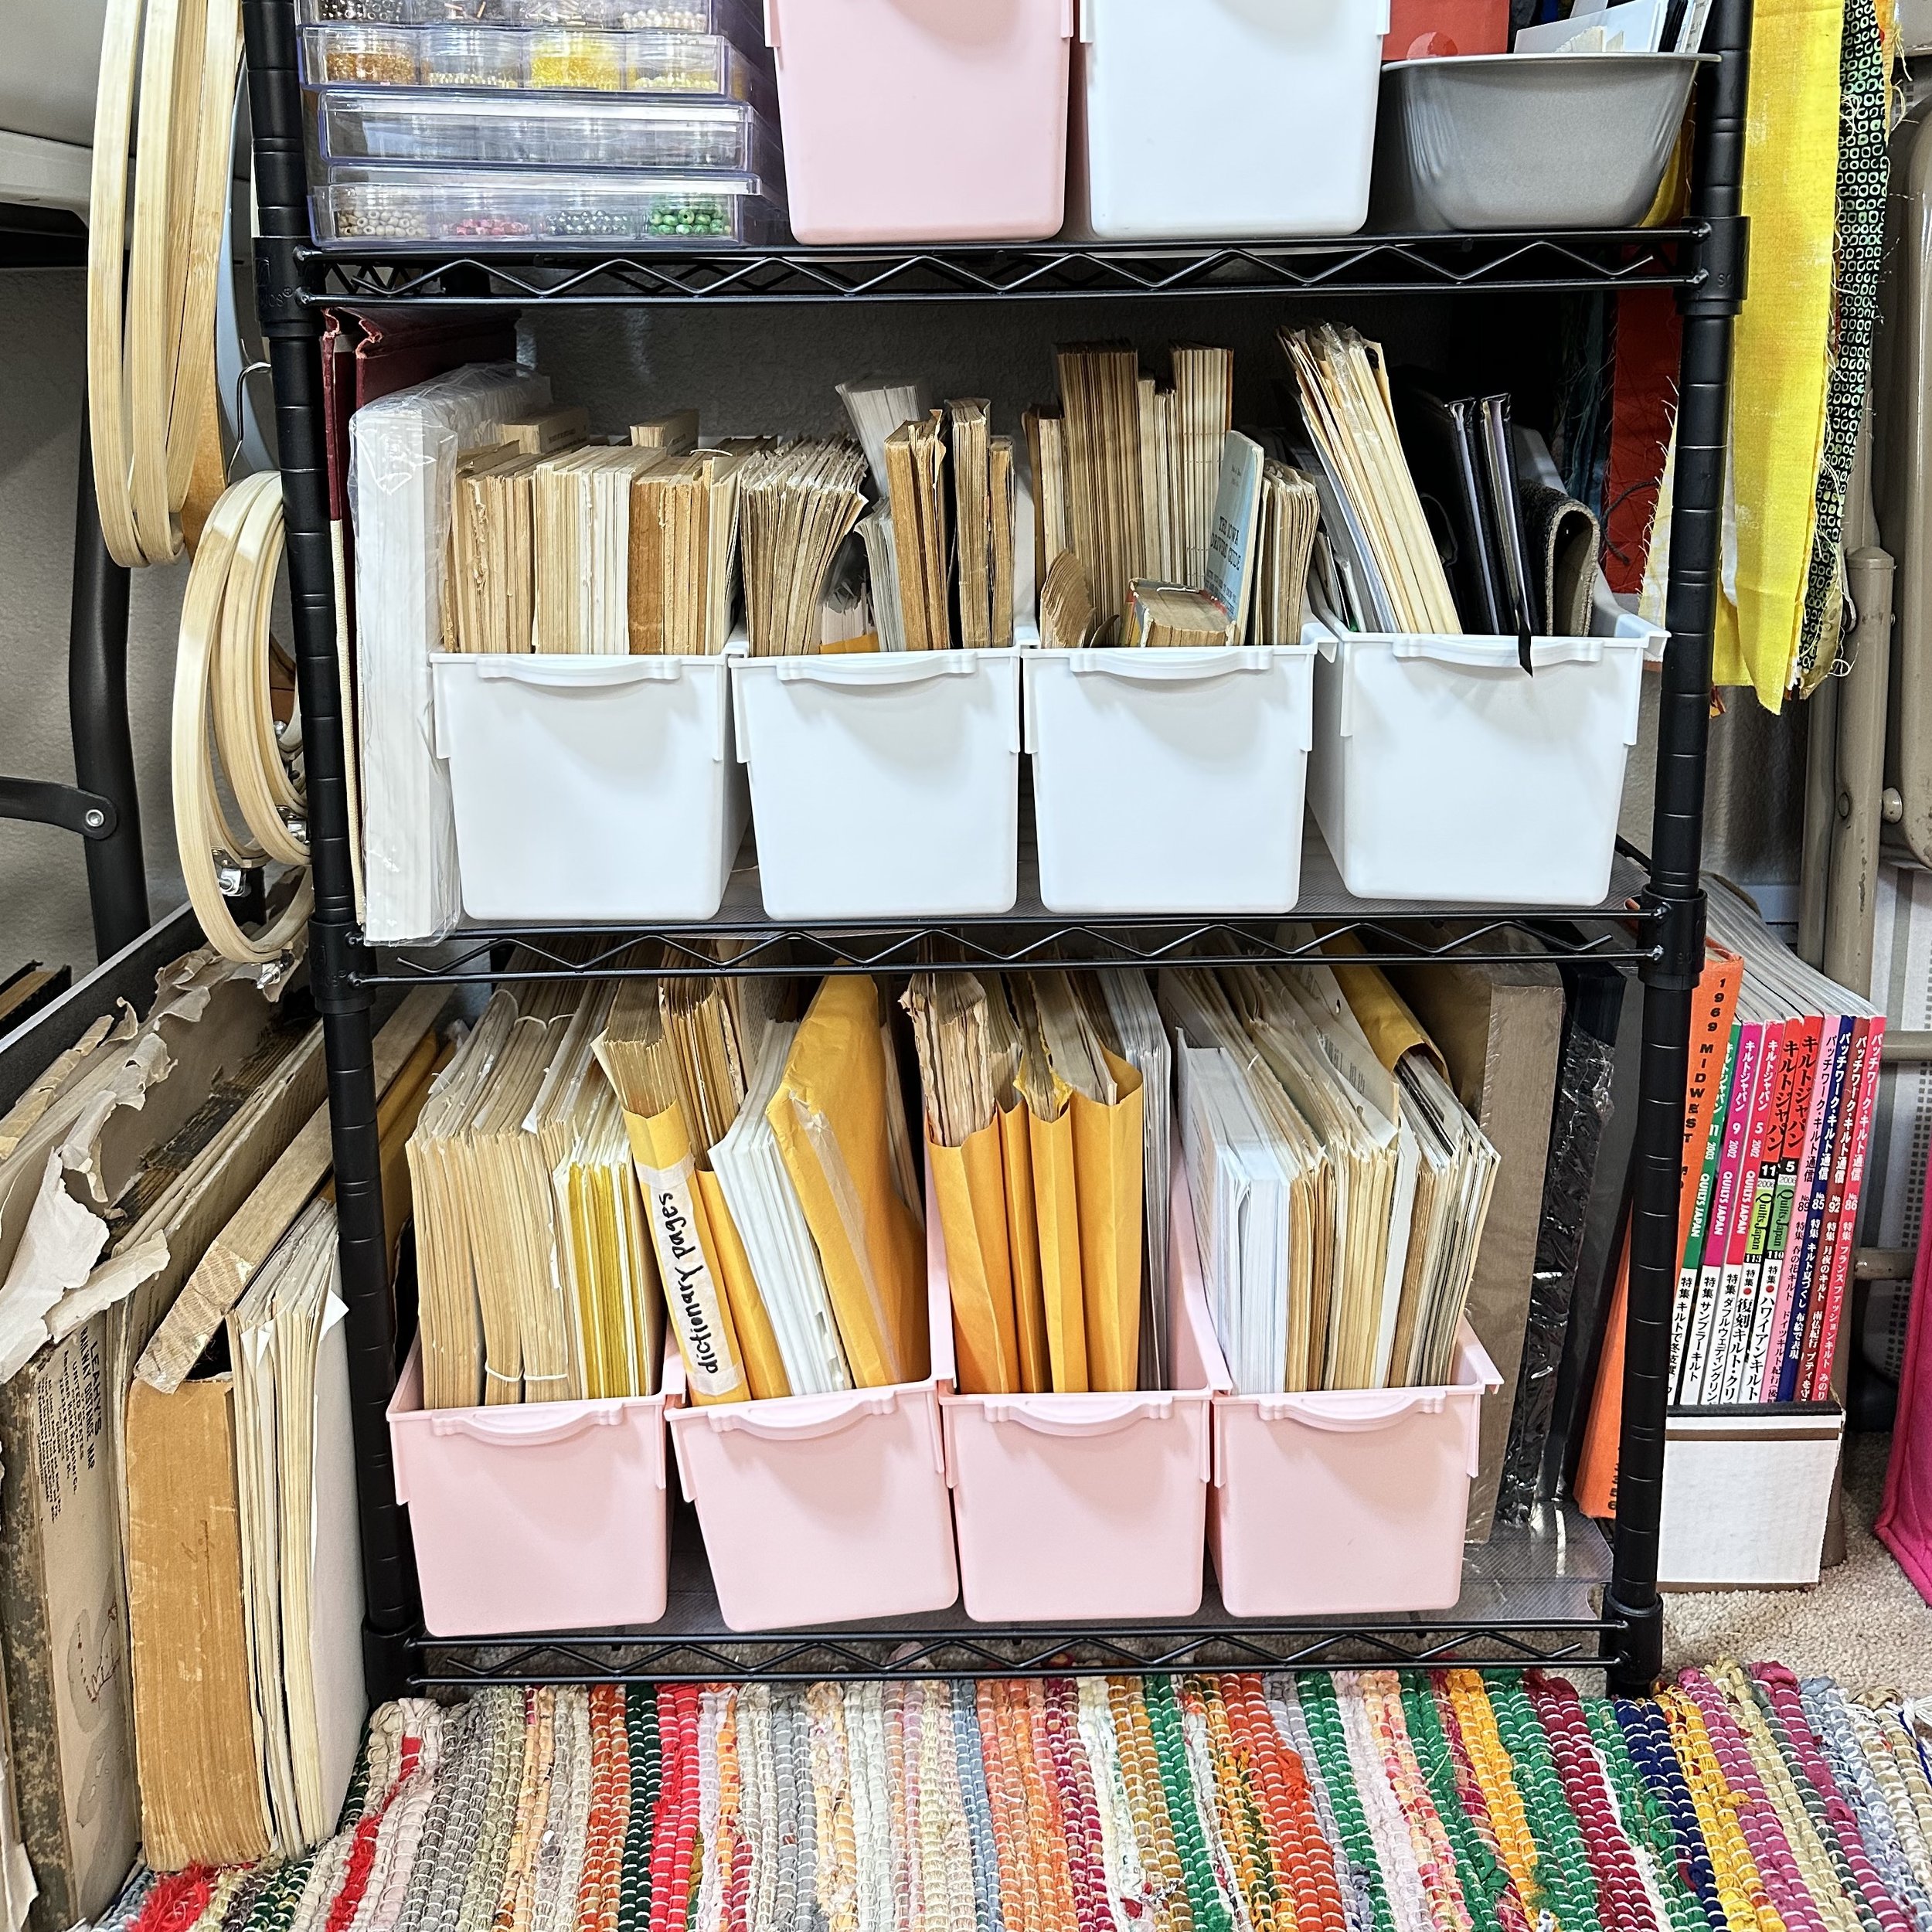

Next, let's take a closer look at the papers that I access and use regularly, which are stored in a hanging file folder system. To accommodate larger paper sizes and avoid folding, I opted for legal size folders instead of the standard 8.5" x 11" letter size. I find it visually unappealing when papers stick out from the sides, so I made sure to eliminate this issue. I have two separate bins for my hanging folders. The first bin contains all of my "handmade papers," which are papers that I have added art to, such as mark making papers, drippy papers, gelli prints, and mastersheets. I sort these by color grouping, mainly. The only papers that are not sorted by color are my mastersheets. These are stored in three different folders: in progress, completed, and cut-offs.
The second container holds a variety of "found papers" that I keep in excess storage, such as dictionary pages, manuals, book text, music sheets, Japanese magazines, kraft cardstock, white cardstock, deli paper, and more. Each folder is labeled based on its contents, making it easy to find a specific page.
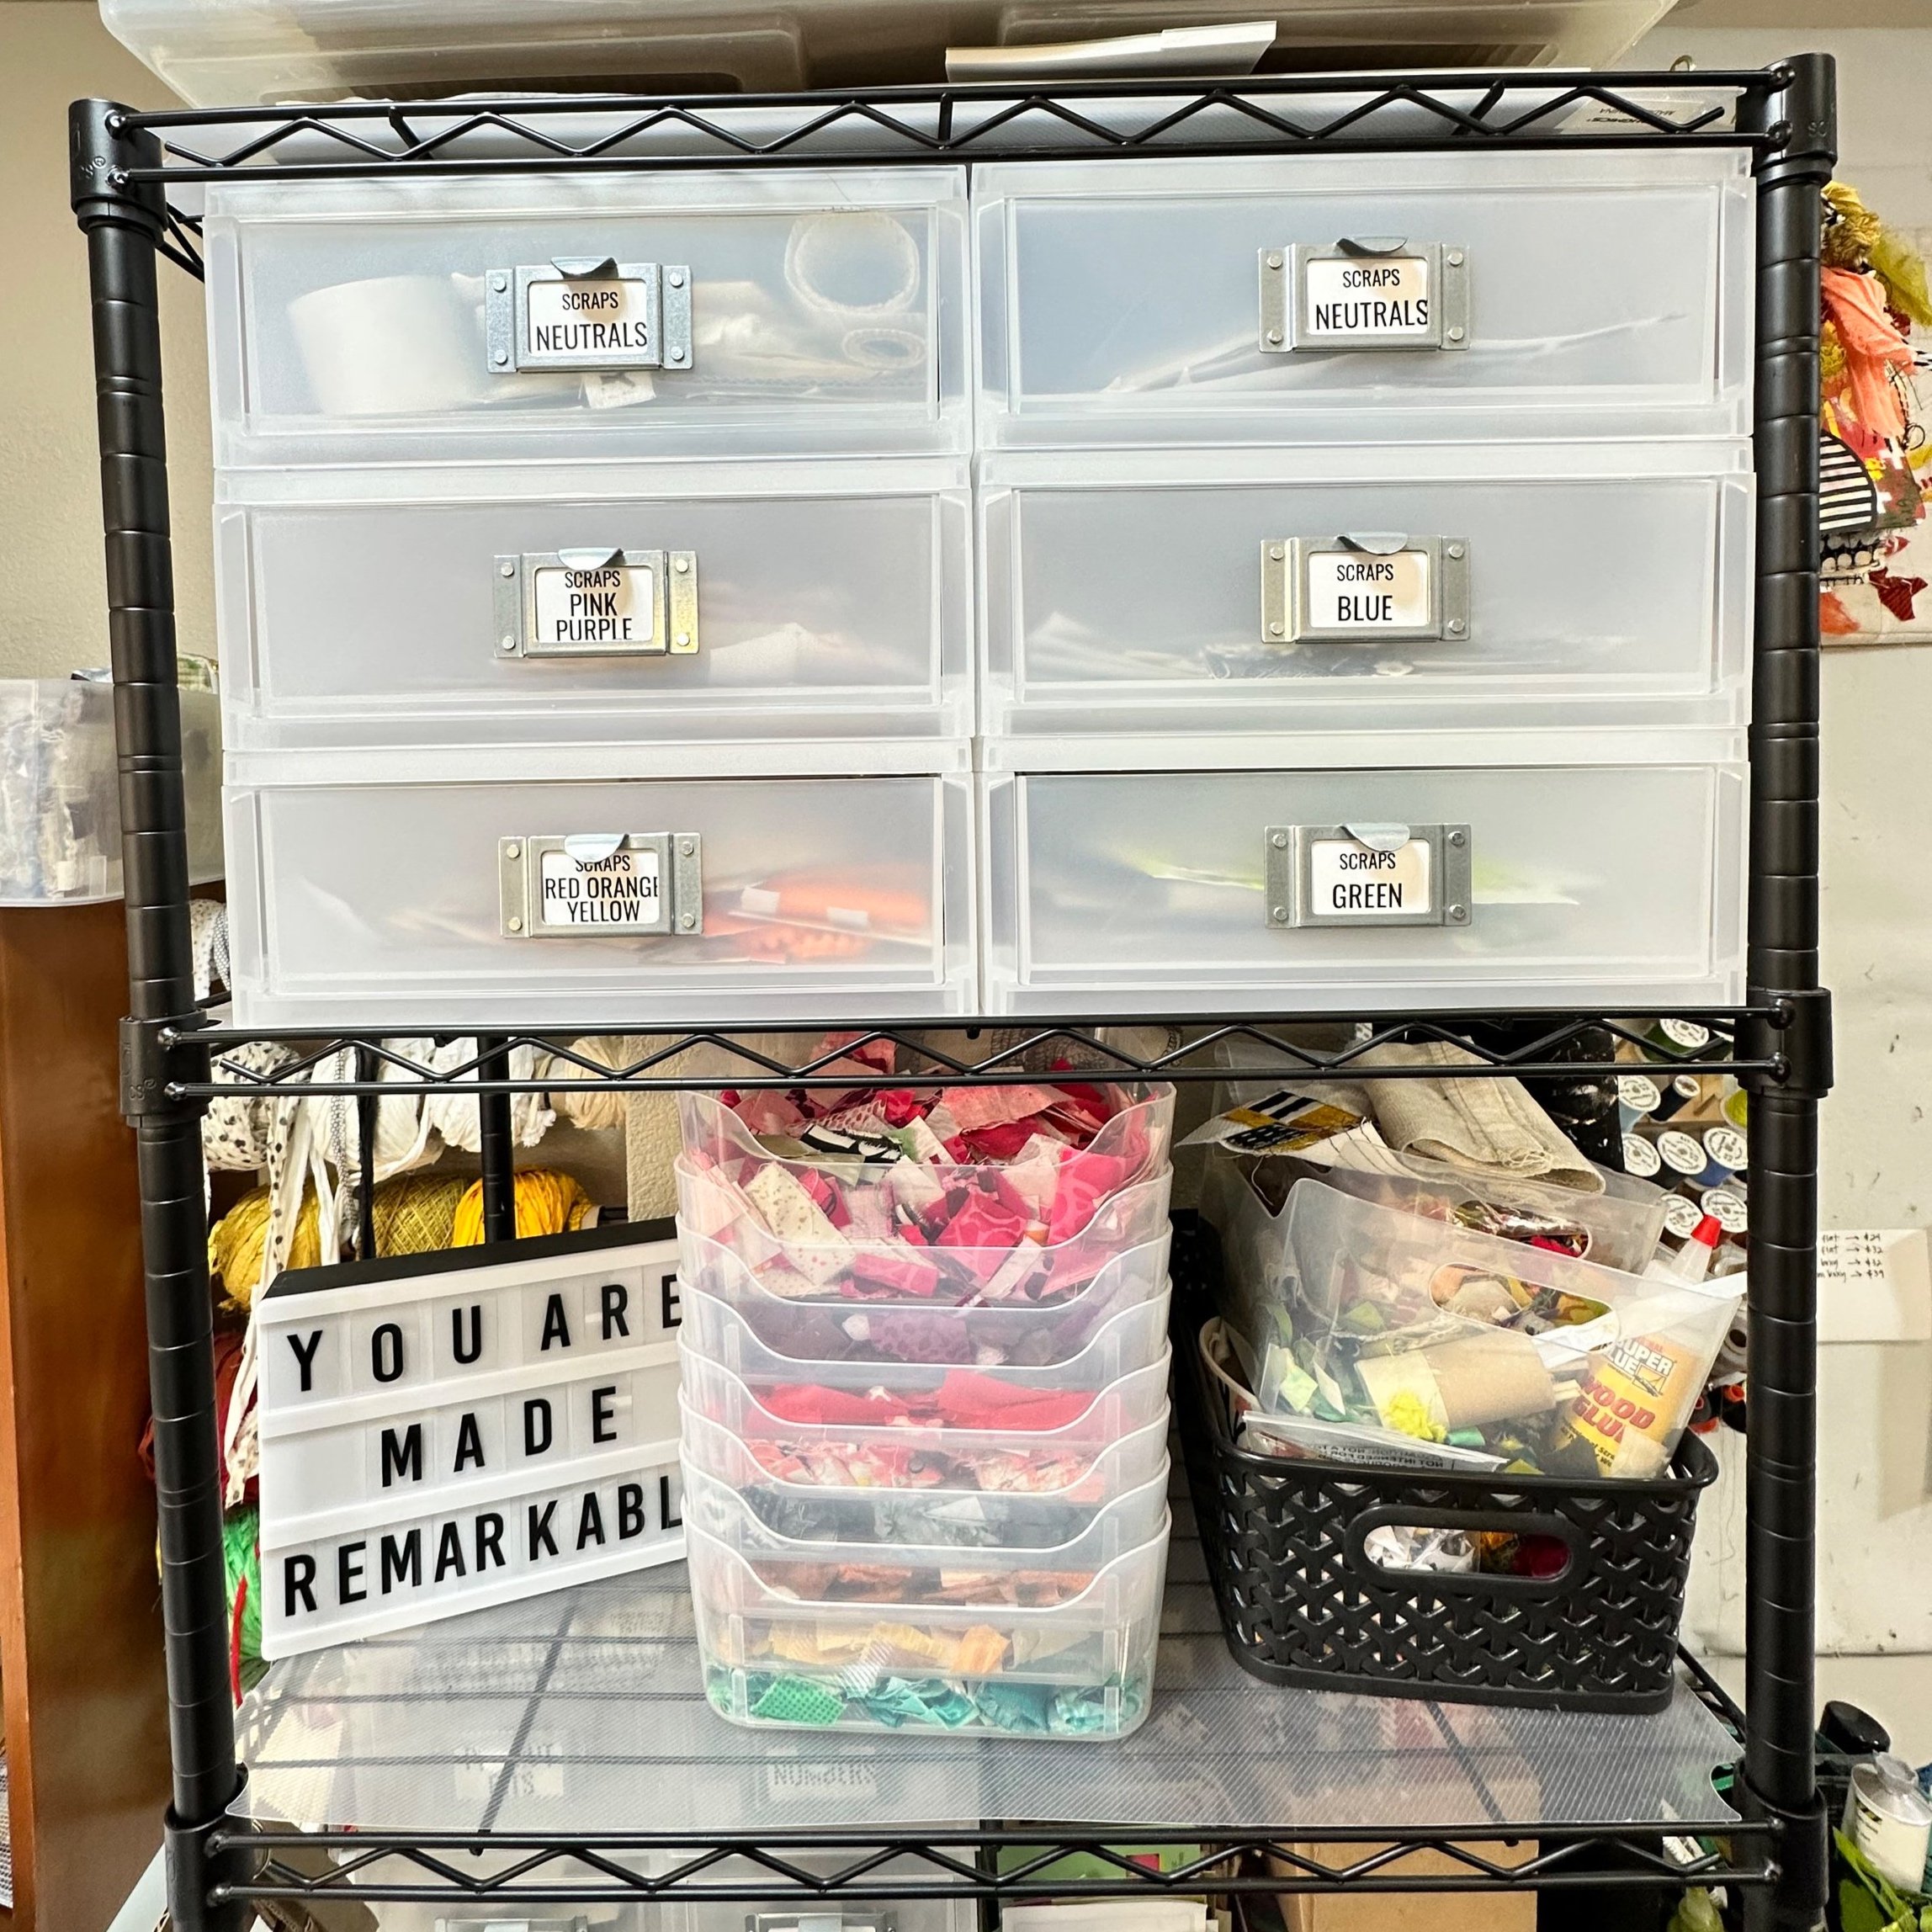
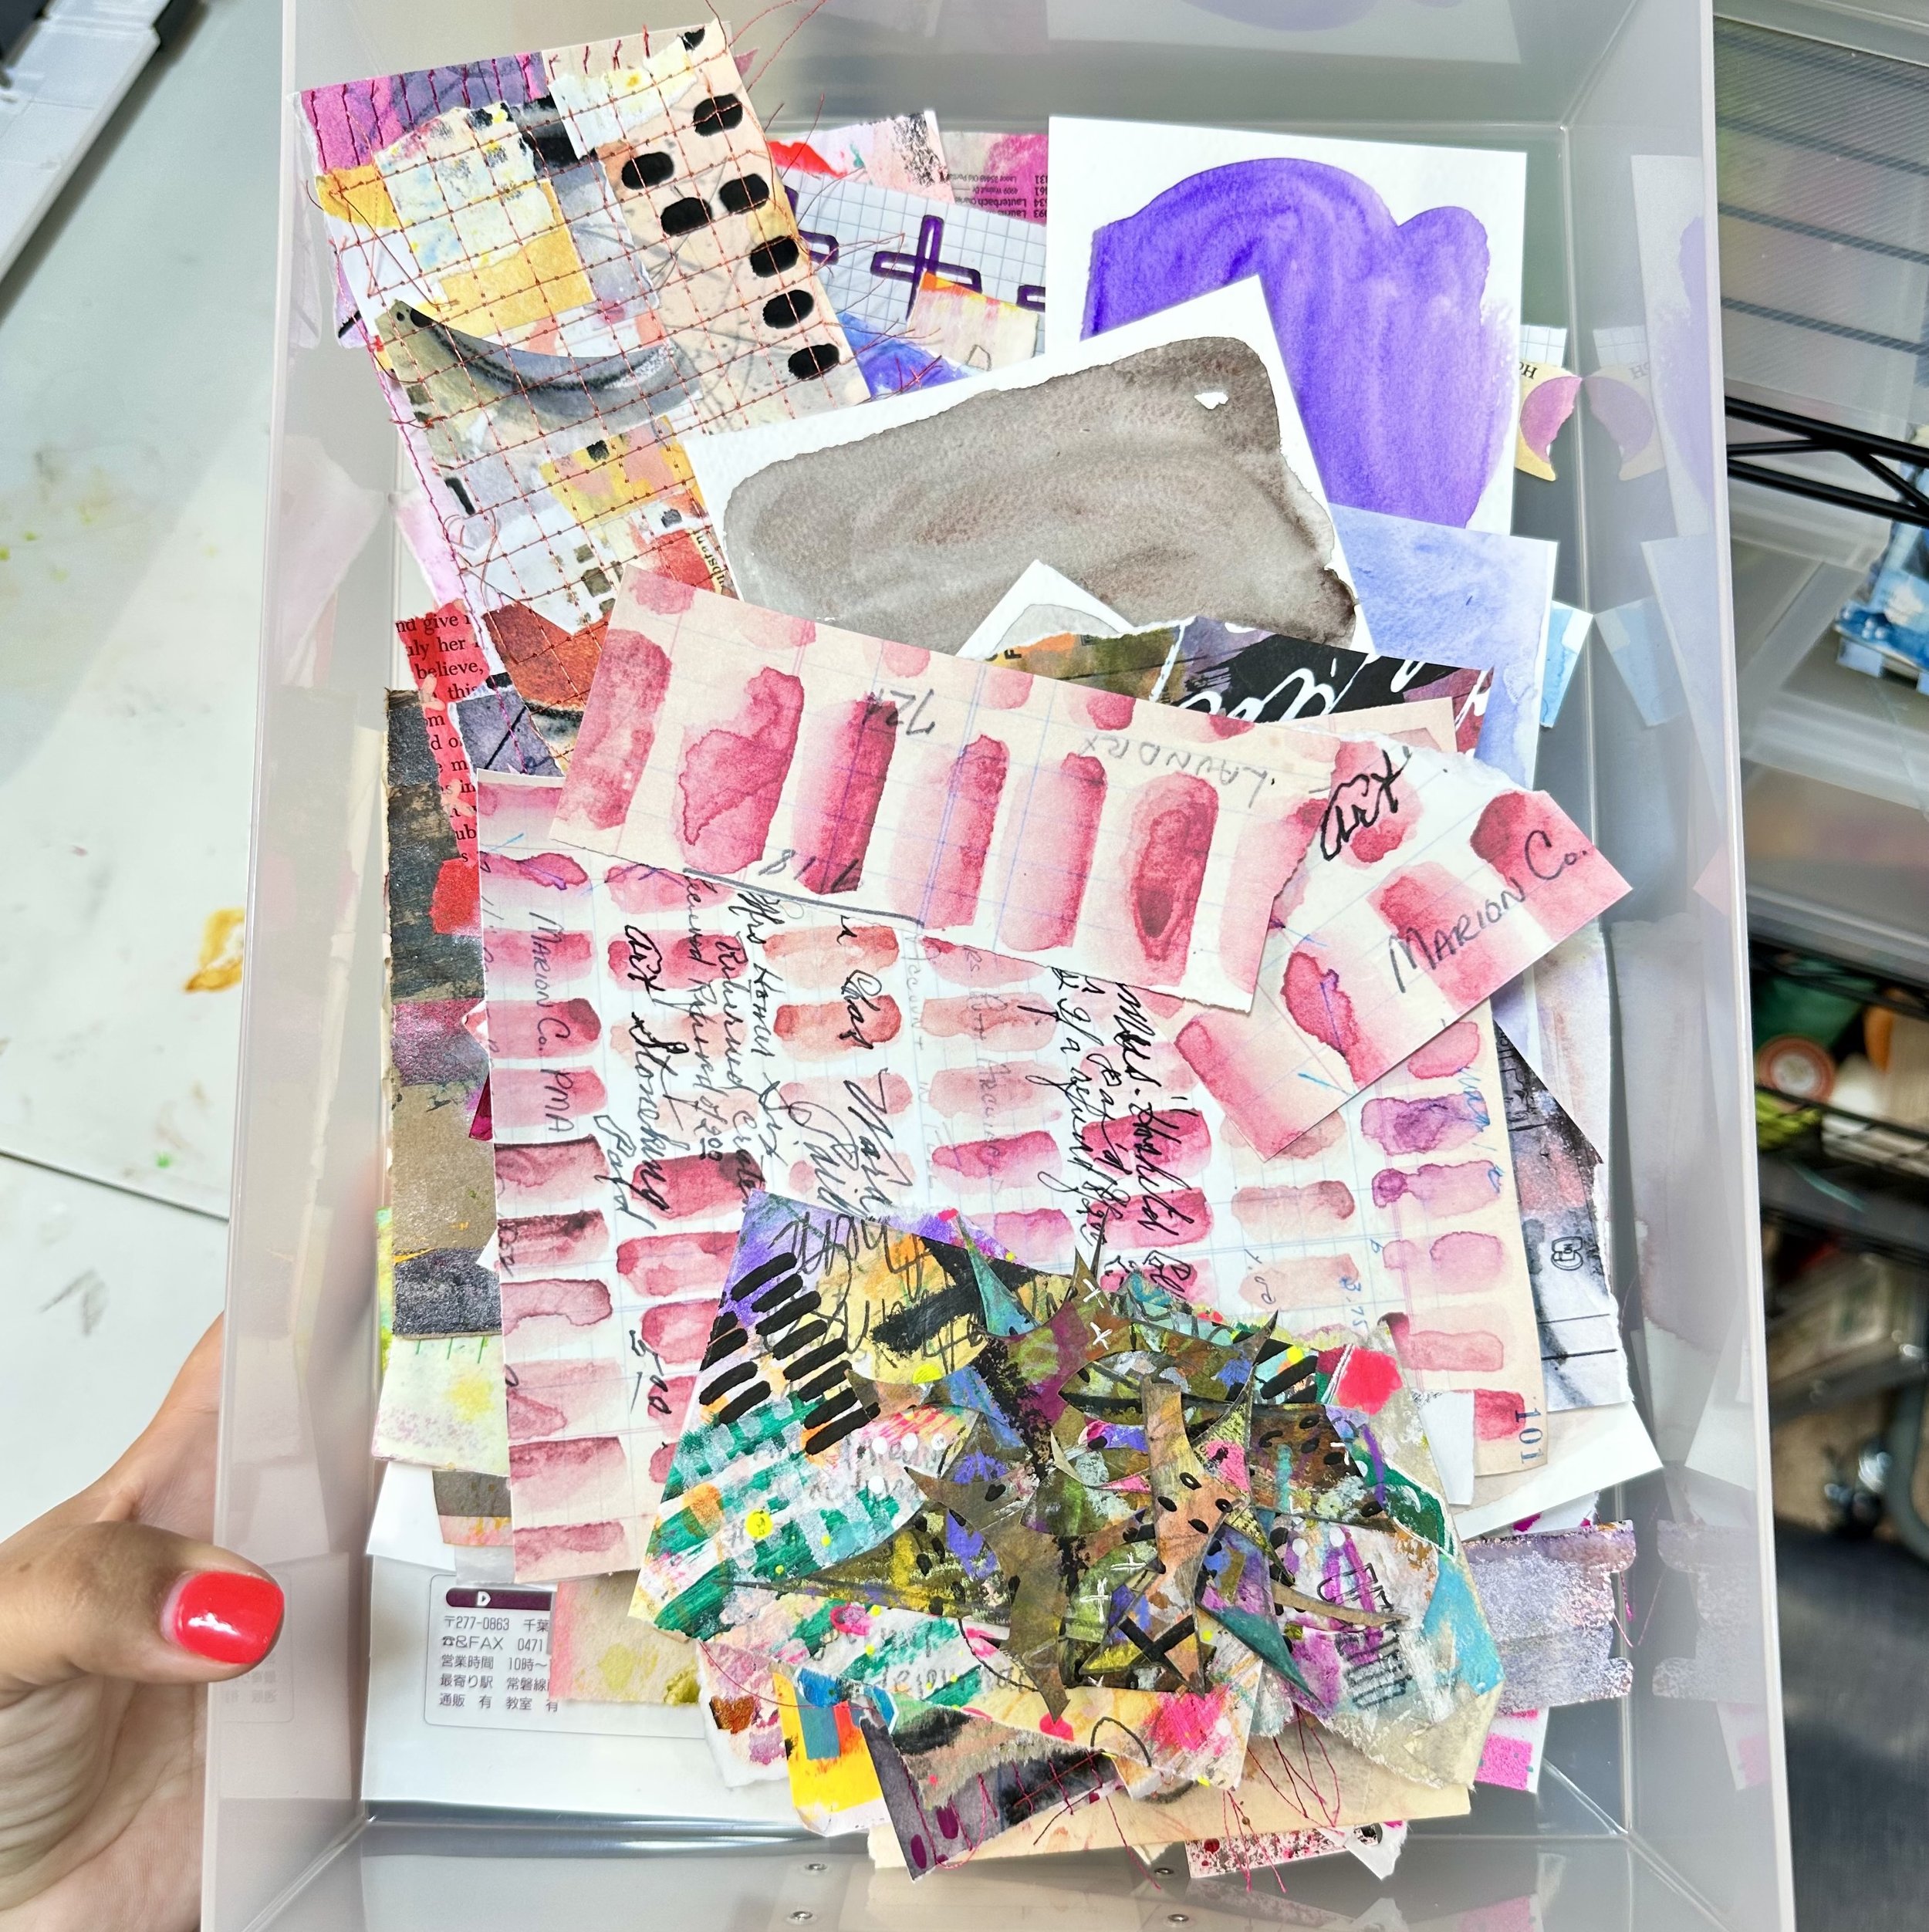
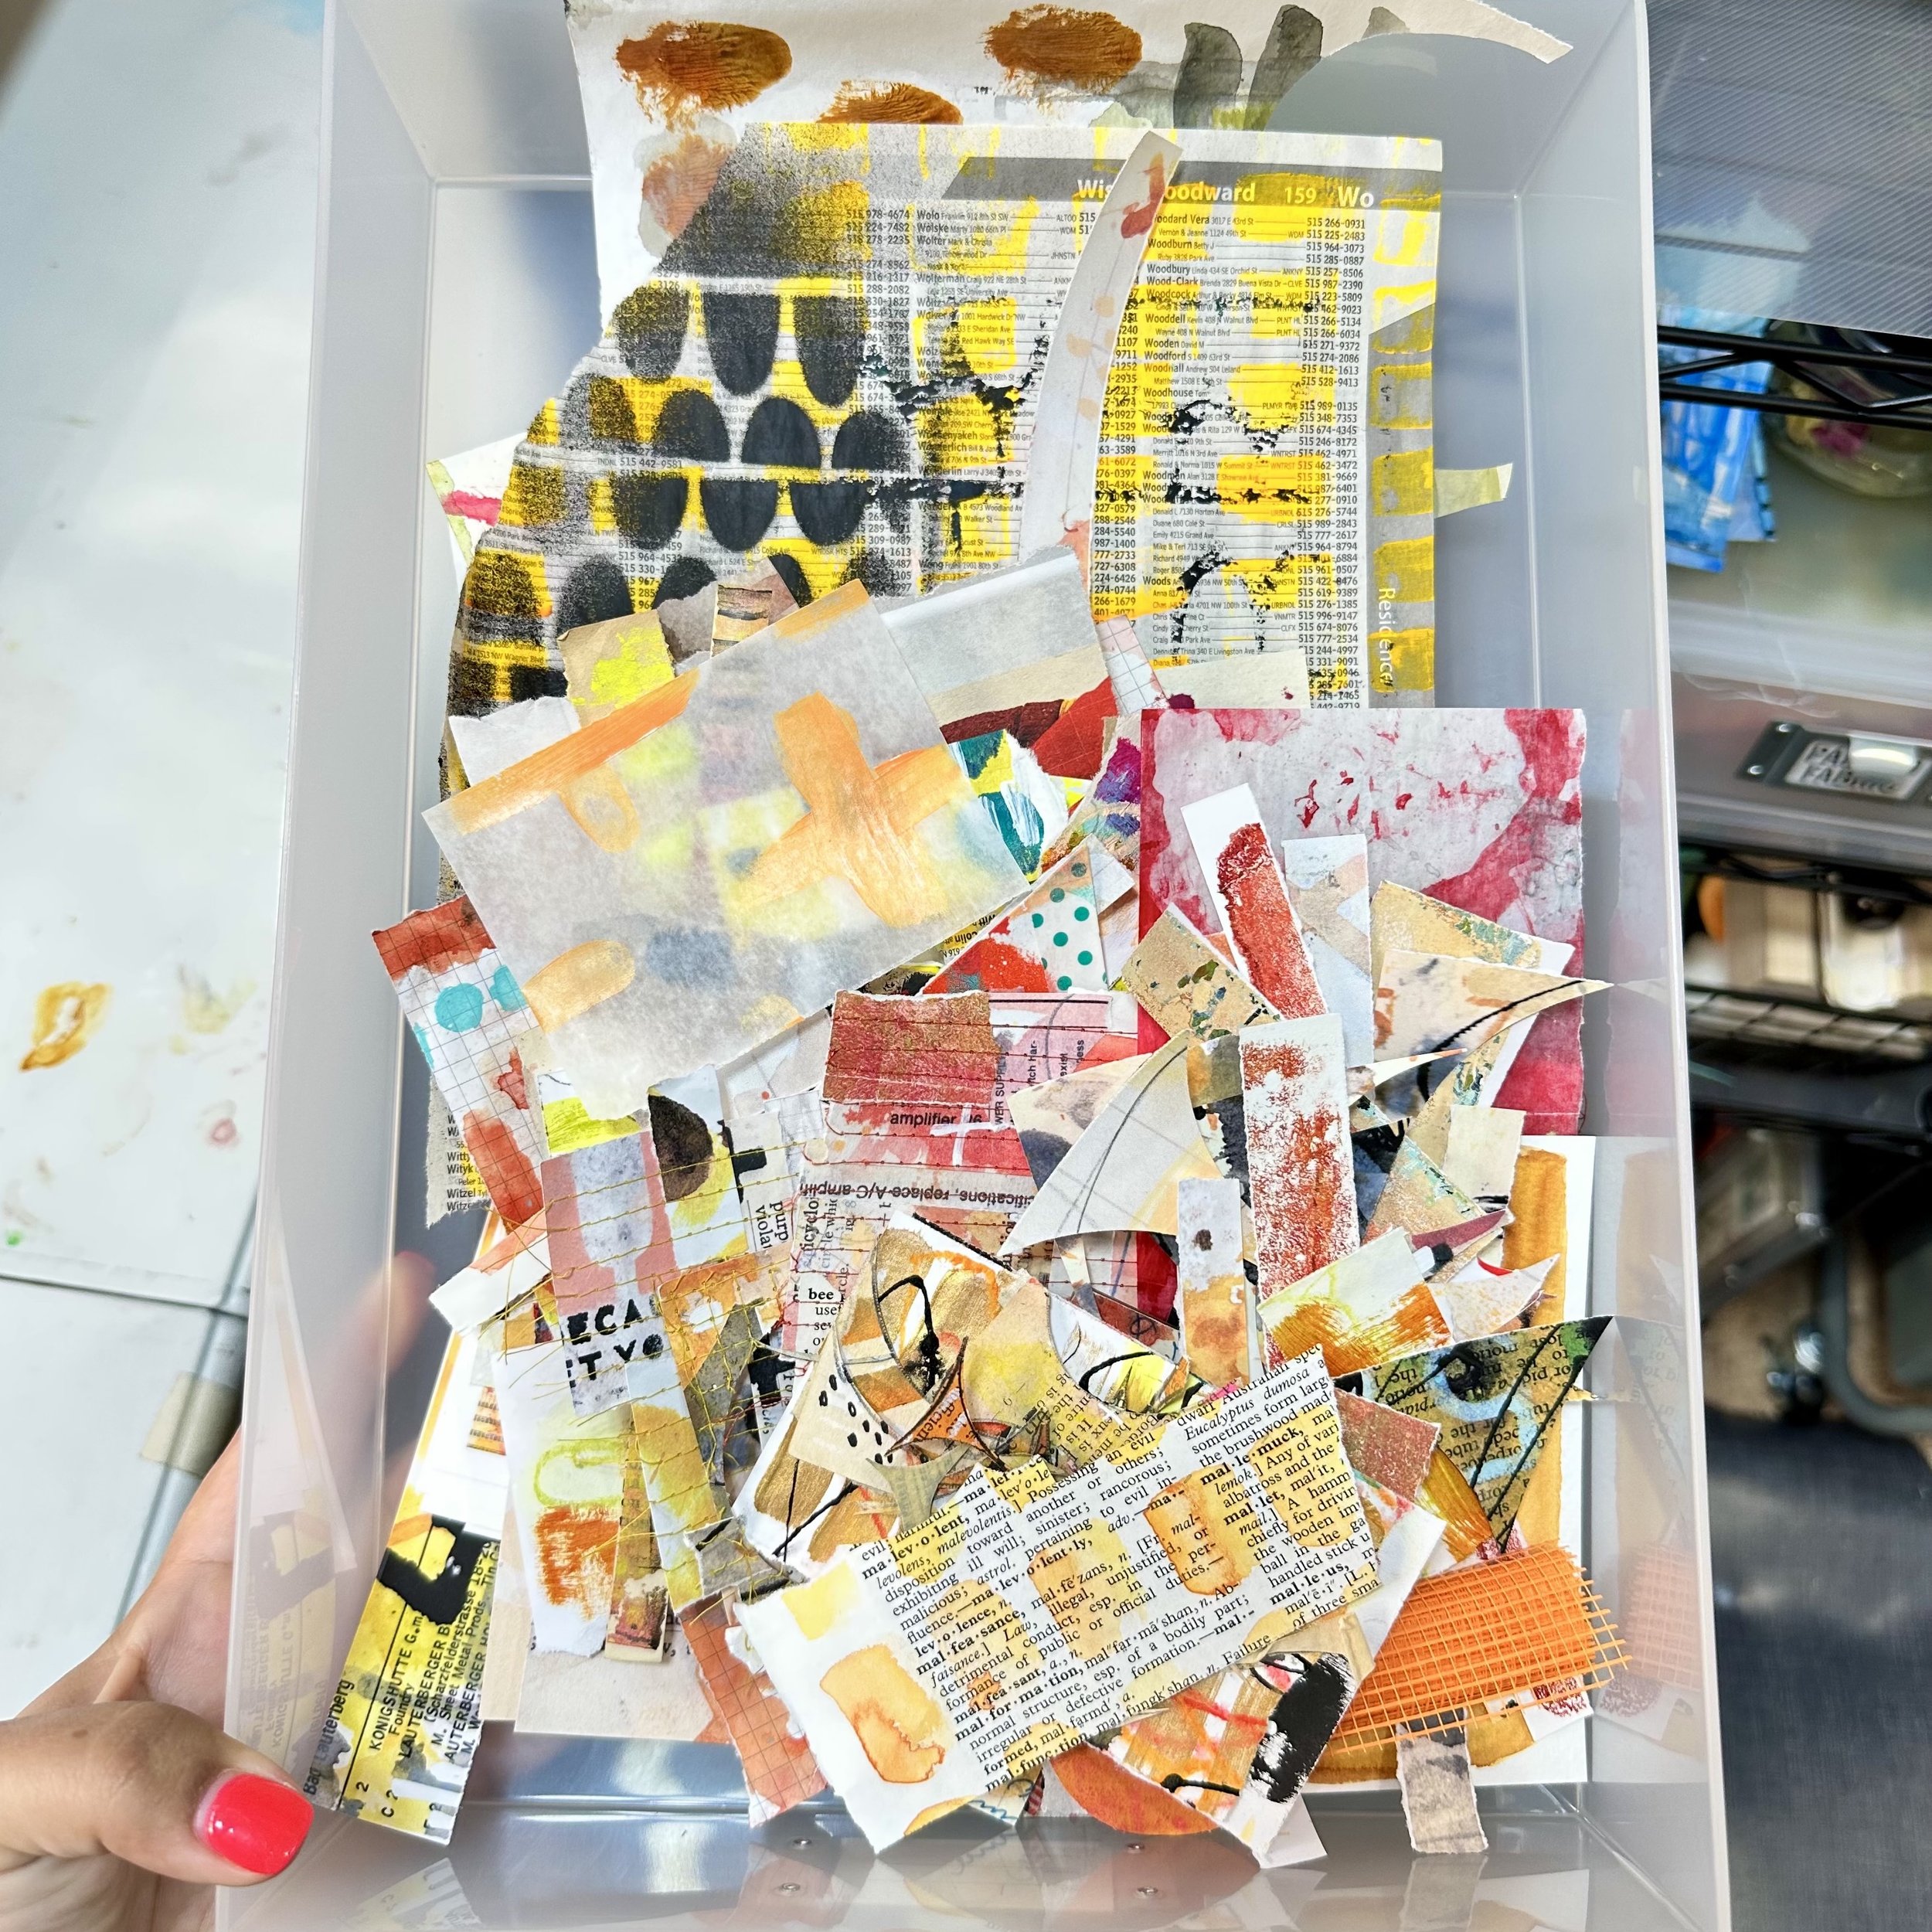
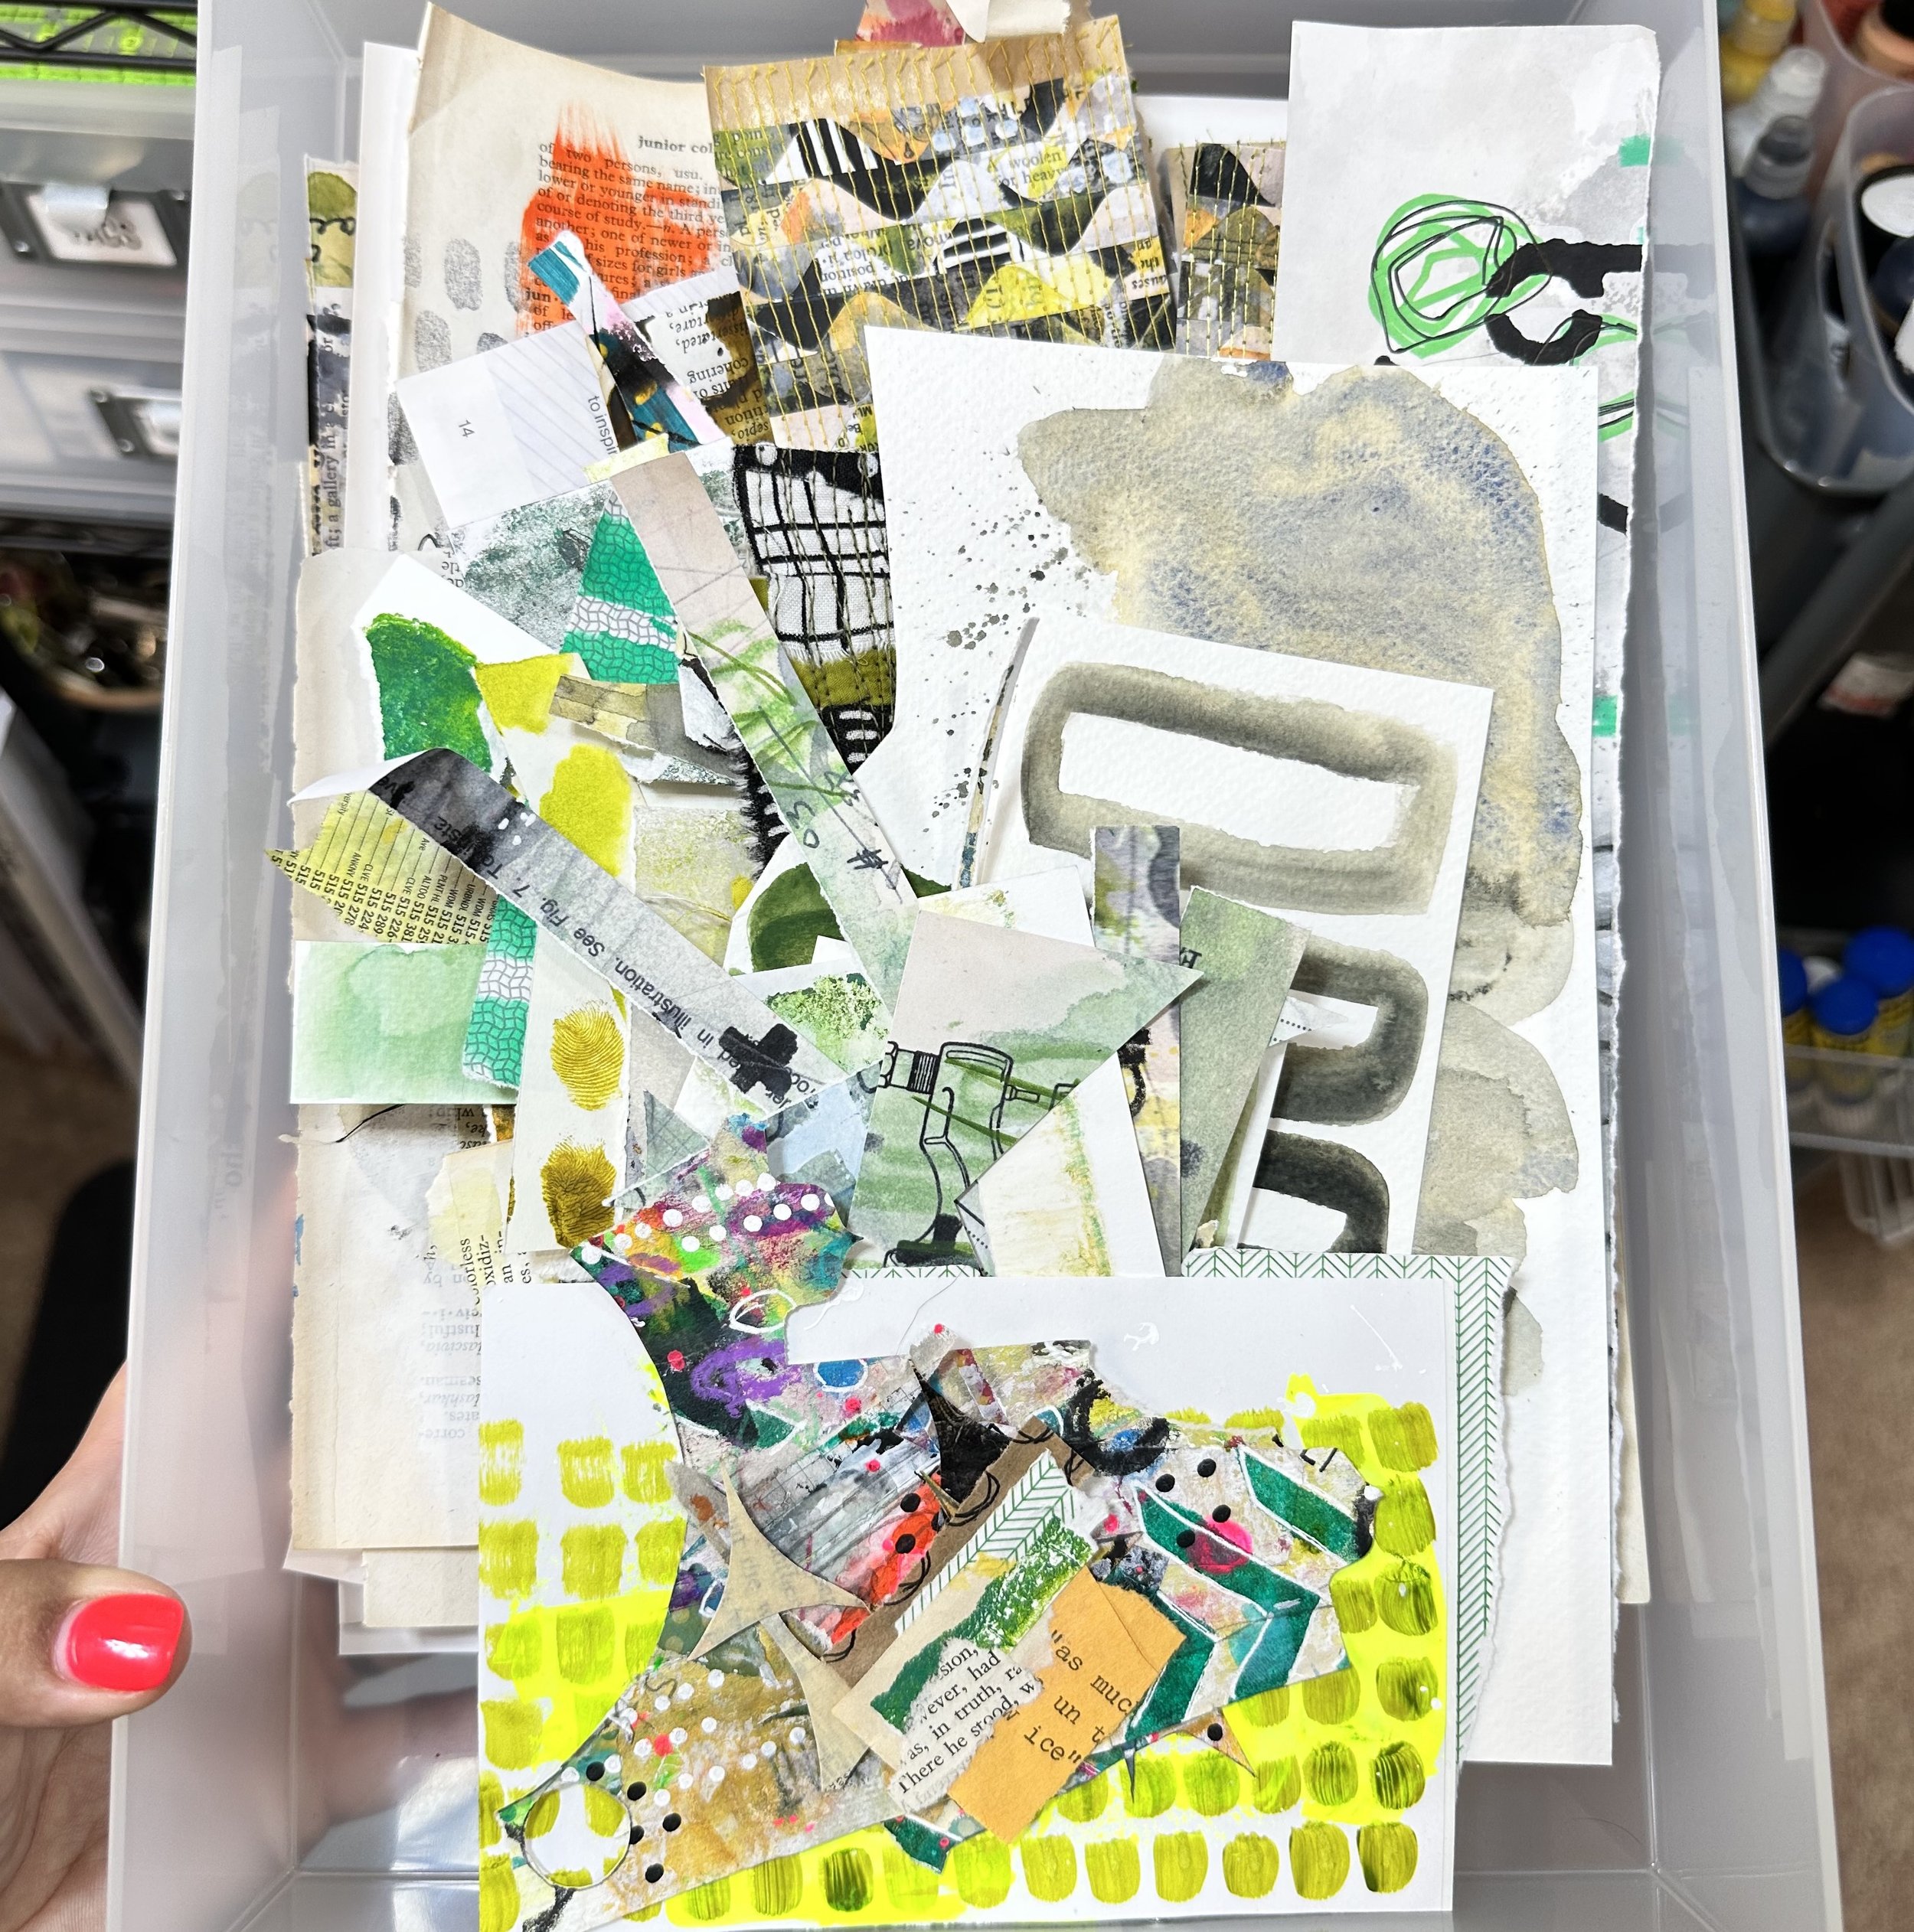
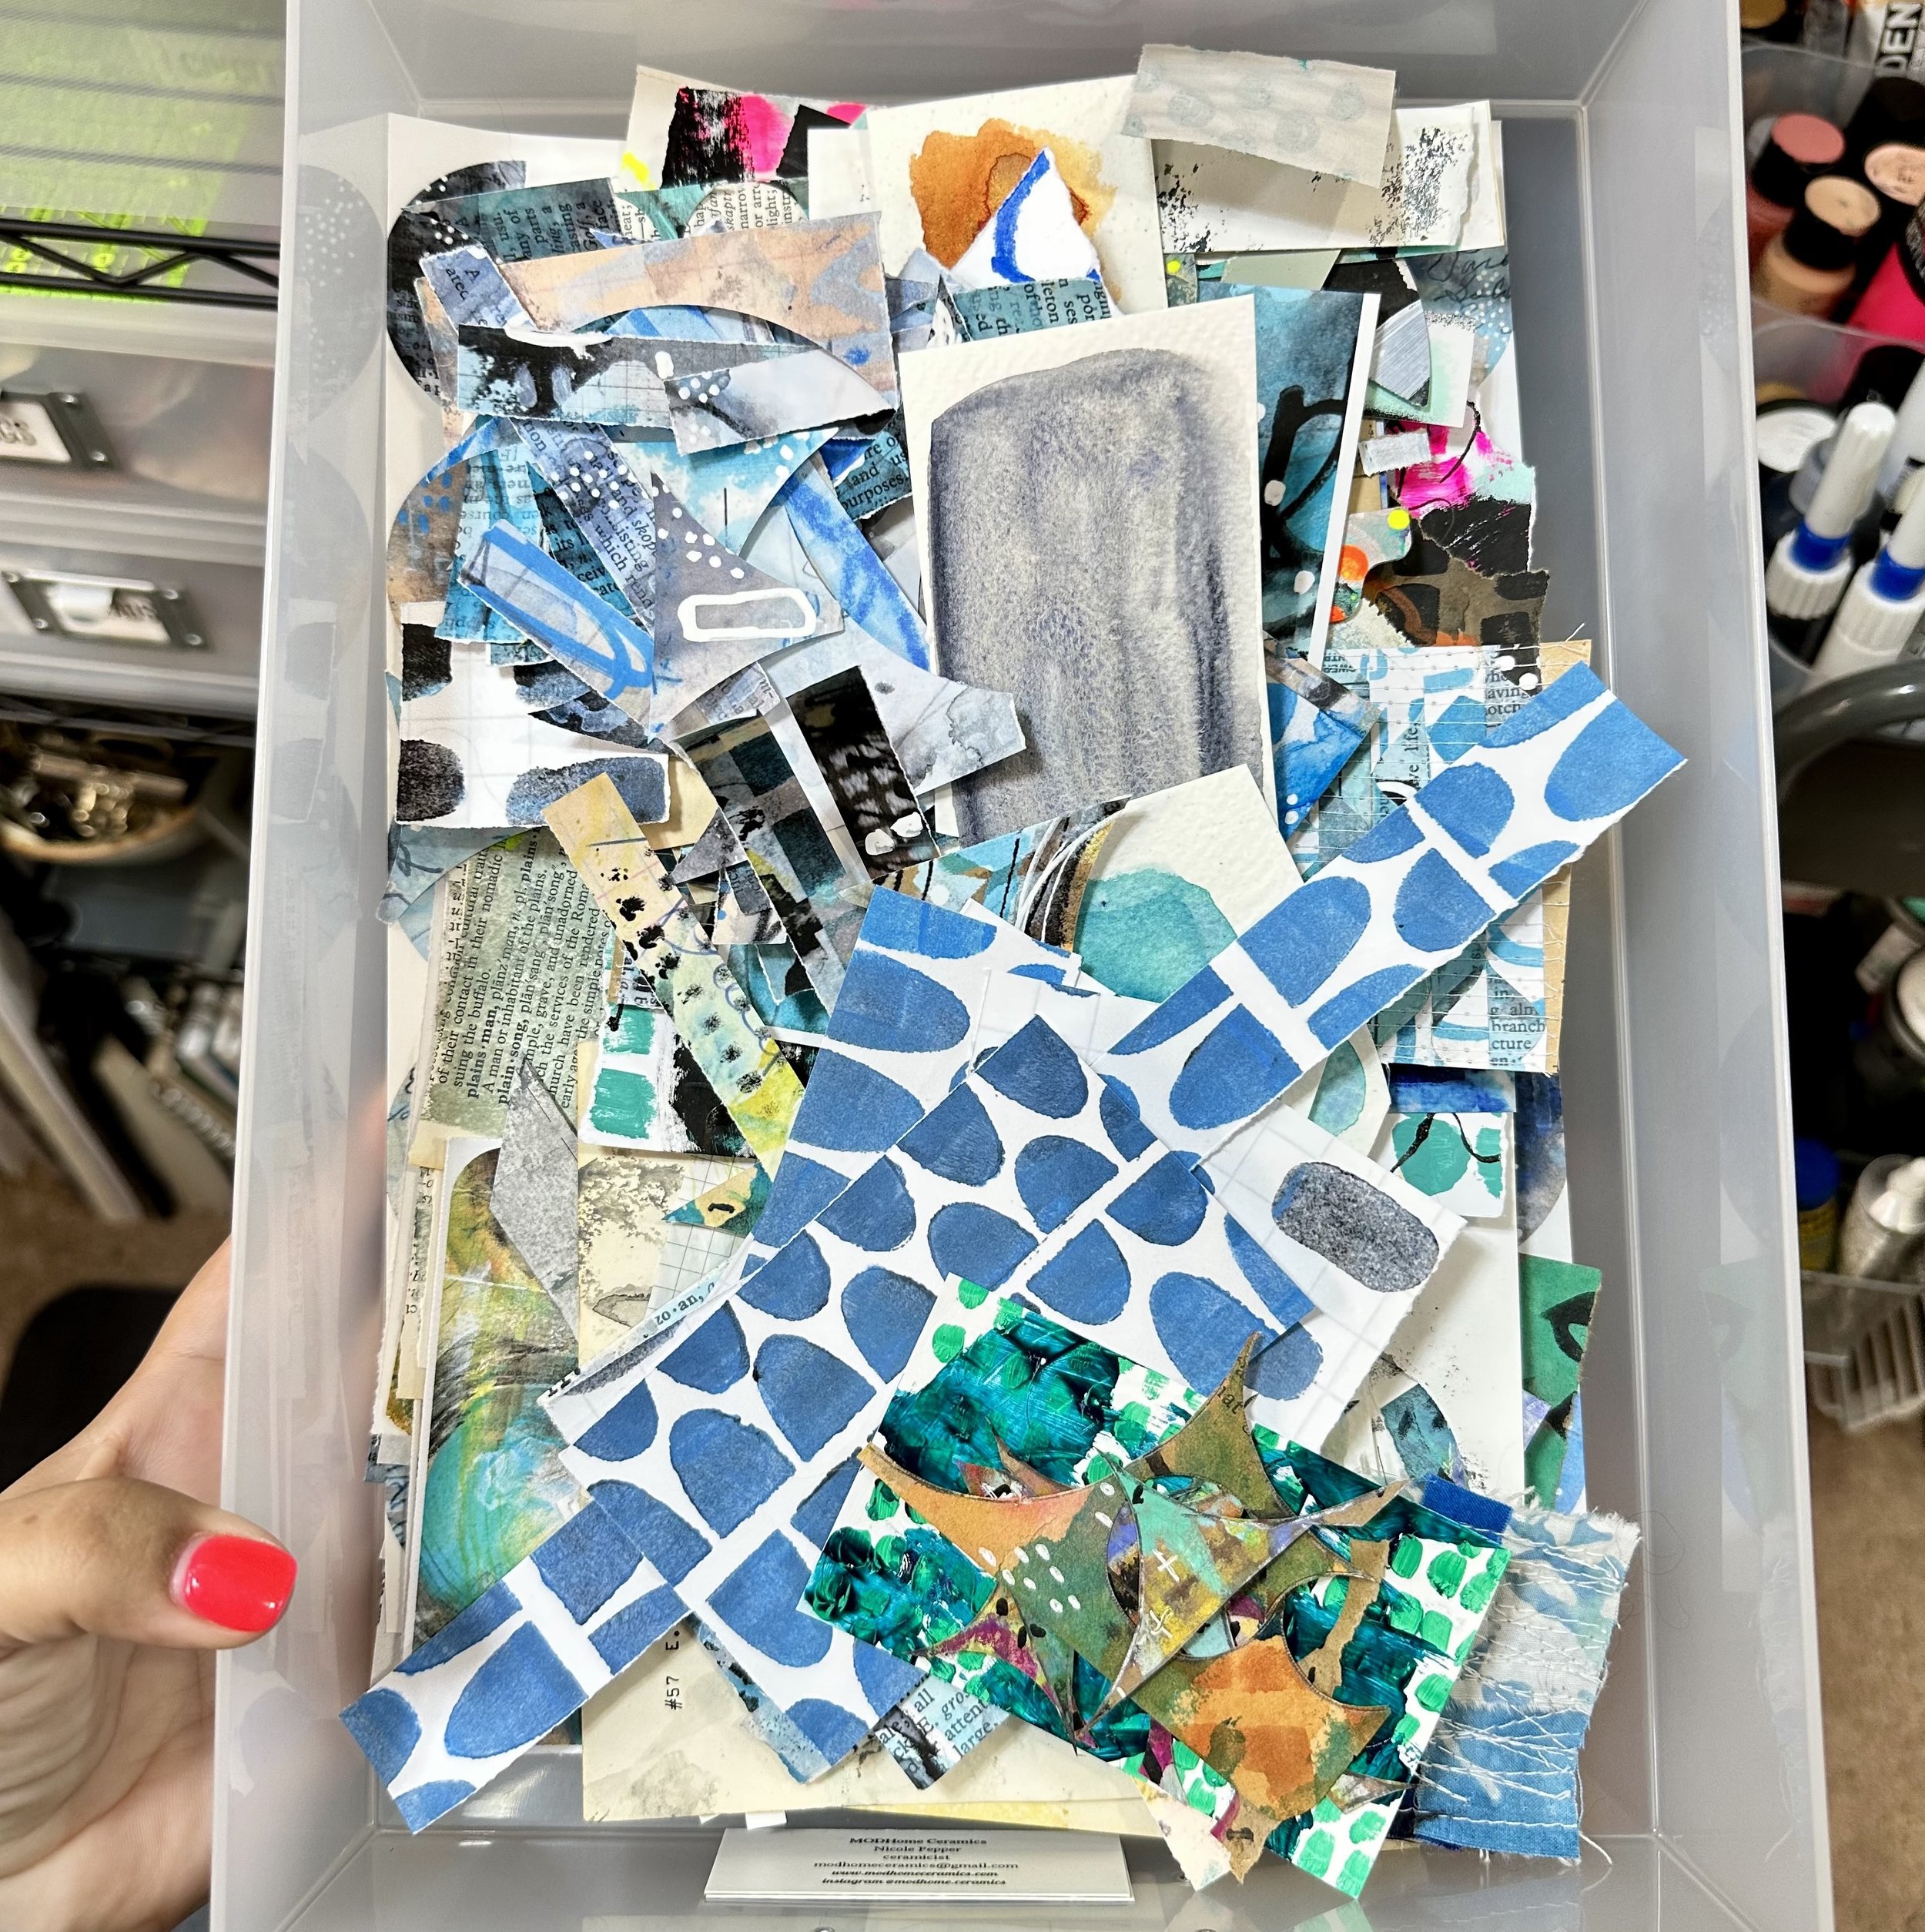
Finally, the stash of papers I use most often are my scrap papers. These are papers that have been cut or torn down to smaller sizes and are stored in six different drawers. I don't have an exact rule for sizing, but generally, they are anything smaller than half of a sheet of regular paper. I sort them by color, which makes it easy for me to use them when needed. The six scrap drawers are categorized as follows:
Neutrals (found papers - papers that have nothing added to them like paint or marks)
Neutrals (handmade papers - papers with added paint or marks)
Pinks and Purples
Reds, Oranges, and Yellows
Greens
Blues

Thank you for taking the time to read through my paper organization system. I hope you found some helpful tips and ideas that you can use in your own creative endeavors. In the next article, I will be discussing how I organize and store my embellishments, so stay tuned for more organization inspiration.
